Mold can turn your home into a science experiment gone wrong in the blink of an eye. You’ve got to act fast to prevent it from spreading and causing even more damage. First things first: safety is key. You’ll need protective gear to shield yourself from harmful spores. However, knowing how to tackle this issue effectively requires understanding several crucial steps that could mean the difference between a minor inconvenience and a major headache. Curious about how to navigate this tricky situation? Let’s explore what you need to know.
Key Takeaways
- Identify and eliminate the source of moisture quickly to prevent further mold growth.
- Wear appropriate protective gear, including gloves, goggles, and respirators, during remediation activities.
- Contain the affected area using plastic sheeting to prevent spores from spreading to other parts of the home.
- Remove contaminated materials, sealing them in plastic bags for proper disposal according to local regulations.
- Use dehumidifiers and fans to dry the area thoroughly, ensuring humidity levels stay between 30-60%.
Identify the Source of Moisture
To effectively tackle mold issues, you must first identify the source of moisture fueling its growth. Mold thrives in damp environments, so pinpointing moisture sources is essential for successful remediation.
Start by inspecting areas prone to water accumulation, like basements, attics, and bathrooms. Check for leaks in pipes, roofs, and around windows, as these can introduce unwanted moisture into your home.
Next, assess your home’s ventilation. Poor airflow can trap humidity, creating ideal conditions for mold. Make sure exhaust fans in bathrooms and kitchens work efficiently, and consider using a dehumidifier to maintain optimal humidity levels, ideally between 30-60%.
If you live in a humid climate, keeping windows closed during high-humidity periods can also help.
Additionally, look at your home’s exterior. Ensure gutters and downspouts direct water away from the foundation and that landscaping slopes away from the house. This simple prevention method can significantly reduce moisture intrusion.
Finally, monitor indoor humidity levels, especially in areas prone to dampness. You can invest in a hygrometer to keep track.
If you notice persistent moisture, it’s crucial to act quickly to prevent mold growth.
Assess the Extent of Infestation
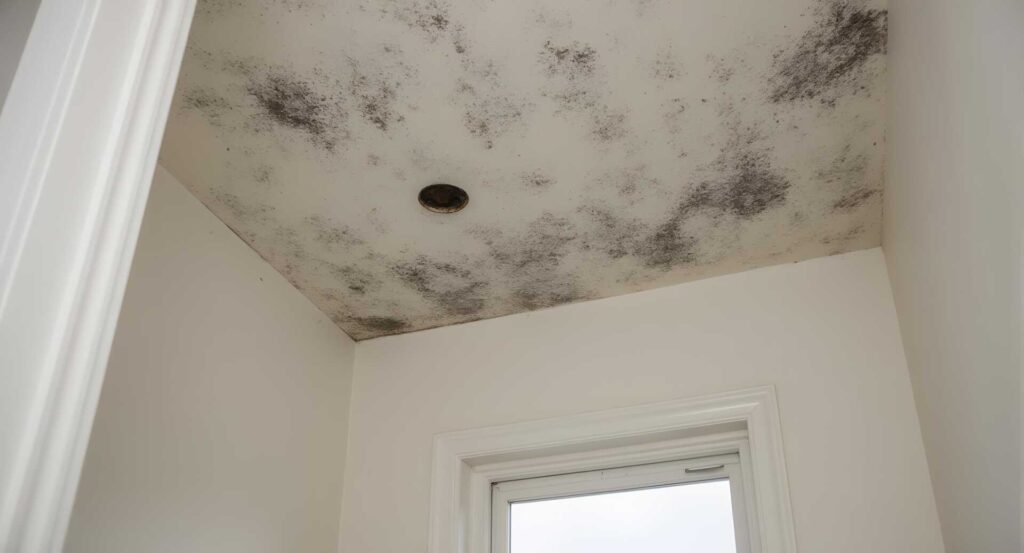
To effectively assess the extent of mold infestation, start with a thorough visual inspection of affected areas, looking for discoloration, texture changes, or musty odors.
Once you’ve identified visible mold, consider testing for specific mold types using sampling kits or professional services, as different molds may require different remediation approaches.
This comprehensive assessment will guide your next steps in the remediation process.
Visual Inspection Techniques
When tackling a mold infestation, a thorough visual inspection is crucial for assessing the extent of the problem. By using inspection tools and identifying visual cues, you can pinpoint affected areas and understand the severity.
Start by examining high-risk zones like basements, bathrooms, and around windows.
Here are some key factors to consider during your inspection:
- Look for discoloration on walls and ceilings – yellow, brown, or black stains may indicate mold growth.
- Check for water damage or leaks that can create a conducive environment for mold.
- Inspect hidden areas such as under sinks and behind appliances where moisture can accumulate.
- Pay attention to musty odors, which often signal mold presence even if it’s not visible.
- Use a flashlight to illuminate dark spaces and reveal potential mold-hiding spots.
Testing for Mold Types
Testing for mold types is essential for understanding the specific strains present in your environment and determining the appropriate remediation strategies. By identifying the mold species, you can assess the severity of the infestation and tailor your approach effectively.
Various testing methods are available, including air sampling, surface sampling, and bulk material sampling. Each method has its advantages and can help you pinpoint the exact mold species affecting your space.
It’s crucial to recognize that different mold species can have varying health effects. Some molds may produce allergens, while others can lead to more severe respiratory issues or toxic reactions. Knowing which strains are present allows you to take appropriate precautions and inform anyone affected about potential risks.
Once you’ve gathered samples, consider consulting a professional lab for analysis. They can provide insights into the identified mold species and recommend specific remediation strategies based on the results.
Use Protective Gear
When tackling mold remediation, using protective gear is crucial for your safety. Equip yourself with essential safety equipment, including gloves, goggles, and durable masks, to shield against harmful spores.
Choosing the right clothing, such as long sleeves and pants, further minimizes skin exposure to allergens and toxins present in the mold.
Essential Safety Equipment
Protecting yourself during mold remediation is crucial, and having the right safety equipment can make all the difference.
When you’re tackling mold, it’s essential to shield yourself from potential health hazards.
Here’s a list of vital safety equipment you should always have on hand:
- Safety goggles: These protect your eyes from mold spores and chemicals.
- Protective gloves: Choose durable, waterproof gloves to keep your skin safe from irritants.
- N95 respirator: This mask filters out harmful particles, ensuring you breathe clean air.
- Face shield: For extra protection, a face shield can guard against splashes and debris.
- Disposable coveralls: Wearing these keeps your clothes clean and minimizes skin contact with mold.
Proper Clothing Choices
Choosing the right clothing is just as important as having safety equipment during mold remediation. You need to protect your skin from mold spores and chemicals, so opt for clothing materials that minimize exposure. Long-sleeved shirts and full-length pants made from breathable, protective fabrics are essential. Look for items that are tightly woven to prevent spores from penetrating.
Avoid cotton, as it absorbs moisture and can provide a breeding ground for mold. Instead, consider synthetic fibers like polyester or nylon, which repel moisture and dry quickly. Make sure your clothing fits well but isn’t too loose; loose garments can snag on objects and expose your skin.
Wear gloves made from nitrile or rubber to safeguard your hands, and don’t forget to include shoe covers or waterproof boots to protect your feet. If you have protective coveralls, these can offer an additional layer of safety, ensuring your everyday clothes aren’t contaminated.
Finally, remember to wash your clothes separately after remediation to avoid spreading mold spores. By choosing the right protective clothing, you safeguard your health and create a safer environment for everyone involved.
Respiratory Protection Importance
During mold remediation, respiratory protection is crucial to safeguard your lungs from harmful spores and chemicals released during the process.
Failing to use protective equipment can expose you to serious respiratory hazards, which may lead to long-term health issues.
To ensure your safety, consider the following recommended gear:
N95 Respirator: Filters out airborne particles, including mold spores.
Half-Face Respirator with P100 Filters: Provides a higher level of filtration, protecting against both particulates and vapors.
Full-Face Respirator: Offers additional eye protection, preventing irritation from spores or chemical irritants.
Safety Goggles: Shields your eyes from airborne particles and chemical splashes.
Disposable Coveralls: This helps to keep mold spores from settling on your clothing and contaminating other areas.
Contain the Affected Area
How can you effectively contain the affected area when dealing with mold? First, you’ll want to establish clear boundaries to prevent spores from spreading throughout your home.
Start by identifying the specific area where the mold is present, and then use mold barriers, such as plastic sheeting, to seal off this space. Ensure the plastic is at least six mils thick to provide robust protection.
Next, close all windows and doors within the affected area to minimize airflow. It’s also wise to turn off any HVAC systems, as they can circulate spores into other parts of your home.
As a preventative measure, you might consider using fans to direct any airborne spores back towards the contaminated area, but make sure they’re not blowing air into unaffected spaces.
Once you’ve contained the area, consider using a dehumidifier to reduce moisture levels. Mold thrives in damp environments, so lowering humidity can help control its growth.
Ensure that any gaps around doors and windows are sealed with tape or caulk to reinforce your mold barriers.
Finally, limit access to the affected area. This will protect others from potential exposure and help maintain the integrity of your containment efforts.
Remove Contaminated Materials
When you’re ready to tackle mold removal, the next crucial step is to remove contaminated materials. This process is vital for halting mold growth and preventing future infestations. You’ll need to be strategic in your approach to ensure safe and effective mold disposal techniques.
Start by identifying the materials that are irreparably damaged. These might include:
- Carpets and rugs
- Drywall and insulation
- Upholstered furniture
- Ceiling tiles
- Any porous materials that can’t be cleaned
Once you’ve identified the contaminated materials, it’s essential to handle them properly. Use personal protective equipment (PPE) like gloves, goggles, and masks to shield yourself from mold spores during the removal process.
Carefully bag and seal all contaminated items in plastic to prevent the spread of spores. When transporting these materials, ensure they’re kept away from your living space to minimize exposure.
Consider local regulations regarding mold disposal, as guidelines can vary. Some communities require specific disposal methods or locations for mold-infested materials.
Always document the materials you’re removing, as this can be helpful for insurance claims or future remediation efforts.
Dry the Affected Space
After you’ve removed contaminated materials, the next step is to dry the affected space thoroughly. Proper drying is crucial to prevent mold from returning.
Start by ensuring that the area has good air circulation. Open windows and doors to create cross-ventilation if the weather permits. This helps reduce humidity levels and promotes faster drying.
Using a dehumidifier is essential in this process. Set it to a low humidity level, ideally between 30% and 60%. This will effectively extract moisture from the air and surfaces.
Make sure to position the dehumidifier in the center of the affected area for optimal performance. If you’re dealing with a larger space, consider using multiple units to enhance efficiency.
In addition to dehumidifier use, employ fans to increase air circulation. Place high-velocity fans around the area, directing airflow towards damp surfaces.
This speeds up evaporation and helps prevent moisture from settling in corners or hidden places. If possible, keep fans running continuously until the space is completely dry.
Monitor the drying process regularly. Use a moisture meter to measure the levels in various materials, ensuring everything is thoroughly dried.
Apply Mold Inhibitors
To effectively combat the risk of mold returning, applying mold inhibitors directly onto cleaned surfaces is a crucial step in the remediation process. Mold inhibitors work by creating an environment that discourages mold growth, helping you maintain a safe and healthy space.
For effective application, follow these guidelines to ensure the best results:
Choose the Right Product: Select a mold inhibitor specifically designed for your surface type, whether it’s wood, drywall, or concrete.
Clean Thoroughly First: Ensure all visible mold is removed before applying the inhibitor. This allows the product to penetrate surfaces better.
Apply Evenly: Use a sprayer or brush to apply the mold inhibitor evenly across the surface. Avoid pooling, as it can create an environment for mold to thrive.
Follow Manufacturer Instructions: Each product may have different instructions regarding drying times, layering, and reapplication. Adhere to these for maximum effectiveness.
Consider Environmental Factors: Temperature and humidity can affect how well the mold inhibitor works. Aim to apply it in conditions that fall within the manufacturer’s recommended range.
Monitor for Recurrence
Even with mold inhibitors applied, staying vigilant is important to ensure mold doesn’t make a comeback. Monitoring for recurrence is crucial in maintaining a healthy living environment.
After you’ve completed your mold remediation efforts, it’s essential to conduct regular inspections of the areas previously affected by mold growth. Begin by checking for any signs of recurring moisture, as this is often the primary culprit behind mold reemergence.
Inspect areas prone to dampness, like basements, bathrooms, and kitchens, at least once a month. Look for water stains, discoloration on walls or ceilings, and musty odors that could indicate hidden moisture issues.
Keep an eye on your home’s humidity levels, ideally keeping them between 30% and 60%. Investing in a hygrometer can help you monitor these levels effectively.
If you identify any dampness or mold signs, address them immediately. Utilize dehumidifiers in high-moisture areas and ensure proper ventilation to minimize humidity.
Repair any leaks in plumbing or roofing that could lead to recurring moisture. Additionally, consider periodic professional inspections to catch any hidden mold growth early.
Recap
In emergency mold remediation, understanding that moisture is your primary enemy is crucial. Once you identify and address the source of moisture, you’re not just removing mold; you’re preventing future infestations. This proactive approach reveals a deeper truth: effective remediation is about safeguarding your health and home. By following these steps diligently, you’ll restore your space and cultivate a lasting resilience against mold, turning a crisis into an opportunity for improvement and vigilance.