Imagine standing in your home, water creeping across the floor as the weight of uncertainty presses down on you. In moments like these, it’s crucial to act swiftly and methodically to protect your property and peace of mind. You might be wondering where to start or how to navigate the aftermath of a crisis effectively. There are essential steps you can take that will mitigate damage and facilitate a smoother recovery. Let’s explore these critical tips that can make all the difference when you find yourself in a challenging situation.
Key Takeaways
- Assess immediate hazards in your home and establish safe evacuation routes for all household members to ensure safety during a crisis.
- Document all damage with photos and videos, and create a detailed list of affected items for insurance claims.
- Remove standing water quickly and use fans or dehumidifiers to dry out affected areas, minimizing further damage.
- Prepare an emergency supplies kit that includes non-perishable food, water, a first aid kit, and other essential items for at least three days.
- Review your insurance policy coverage, file claims promptly, and maintain communication with your insurance company throughout the claims process.
Assess the Damage Promptly
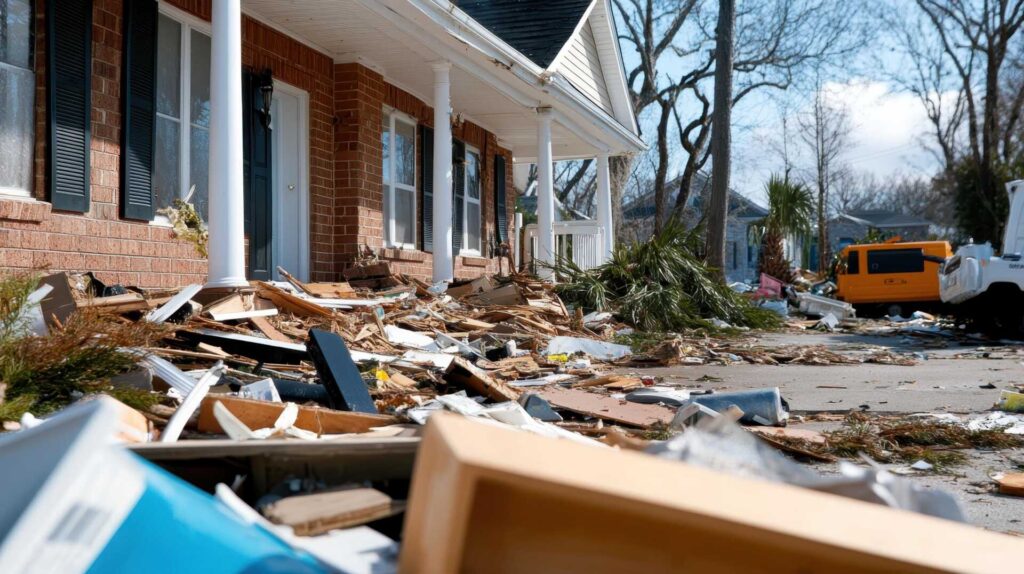
When disaster strikes, the damage assessment is your first step toward recovery. You need to act quickly and methodically to understand the extent of the damage to your home.
Start by documenting everything: take photos and videos of affected areas, ensuring you capture details like broken windows, damaged walls, or flooding. This visual evidence will be crucial for your insurance claims process.
Next, make a list of damaged items, prioritizing those that are essential for your daily life. Include furniture, appliances, and personal belongings.
Don’t forget to note any structural damage, as this might require immediate attention from professionals. While assessing, stay calm and focus on gathering information rather than making quick decisions about repairs or replacements.
Once you’ve completed your damage assessment, contact your insurance company to report the incident. They’ll guide you through the claims process, but having your documentation ready will make this step smoother.
Provide them with the evidence you’ve collected, and be prepared to answer questions about the circumstances surrounding the damage.
Ensure Safety First
When you’re faced with a crisis, your first step is to assess immediate hazards around your home, like downed power lines or gas leaks.
Make sure you establish safe evacuation routes so everyone in your household knows how to exit quickly.
Don’t forget to prepare an emergency supplies kit with essentials like water, food, and first-aid items to keep you and your loved ones secure.
Assess Immediate Hazards
Assessing immediate hazards in your home is crucial to ensure your safety and that of your loved ones. Start with hazard identification by walking through each room and looking for potential dangers. Check for loose wiring, leaking gas, or structural damage. If you notice anything concerning, prioritize those areas for further inspection.
Next, conduct a risk assessment. Evaluate how severe each hazard is and how likely it is to cause harm. For example, a cracked wall may pose less immediate danger than exposed electrical wires. Make a list of the most pressing issues and consider the necessary actions to mitigate them.
Don’t forget to check the outside of your home, too. Look for downed branches, unstable fences, or pooling water that could lead to slips. Your goal is to create a safe space for yourself and those around you.
Once you’ve identified and assessed the hazards, take steps to resolve them as quickly as possible. This may involve calling a professional for repairs or simply rearranging furniture to create a safer environment.
Establish Safe Evacuation Routes
Safety is paramount in any emergency situation, and establishing safe evacuation routes in your home is a vital step in ensuring that you and your loved ones can exit quickly and efficiently.
Start by conducting thorough evacuation planning, considering the unique layout of your home. Identify at least two primary exit routes from every room.
When route mapping, keep these key points in mind:
Accessibility: Ensure all exits are free from obstructions and easily reachable.
Visibility: Clearly mark your routes with signs or glow-in-the-dark tape, especially in areas with low light.
Practice: Regularly conduct drills with your family to familiarize everyone with the routes and reinforce the importance of quick action.
Emergency Contacts: Keep a list of emergency contacts by the exits, so everyone knows who to call in case of an emergency.
Prepare Emergency Supplies Kit
It’s crucial to have an emergency supplies kit ready to ensure your safety and comfort during a crisis. Start by gathering essential items that can help you and your loved ones manage through tough times. Your kit should include a well-stocked first aid kit, complete with bandages, antiseptics, and any necessary medications.
Don’t forget to include a first aid manual for easy reference.
Next, consider your food storage needs. Aim for non-perishable items like canned goods, dried fruits, and nuts that can sustain you for at least three days. Include a manual can opener, and don’t overlook water—store at least one gallon per person per day.
Additionally, pack a flashlight, extra batteries, and a battery-powered radio to stay informed during power outages. Personal documents, cash, and basic toiletries should also be part of your kit.
Finally, don’t forget comfort items like blankets, and if you have pets, include supplies for them as well. By preparing this kit, you’re safeguarding your home and ensuring your family feels secure and cared for during uncertain times.
Identify Mold Types
Mold types often vary in appearance and characteristics, making it essential to identify them for effective remediation. As a homeowner, you’ll want to be proactive in recognizing the signs of mold growth, especially since some types can pose significant health risks.
Black mold, known scientifically as Stachybotrys chartarum, is one of the most dangerous varieties, often associated with toxic mold.
To help you identify different mold types, pay attention to the following characteristics:
Color: Mold can appear in various colors, including green, black, white, and yellow. Black mold is particularly notorious for its dark color and slimy texture.
Texture: Some molds are fuzzy or powdery, while others can look wet and shiny. The texture can give you a clue about its type.
Location: Mold often thrives in damp areas like bathrooms, basements, and kitchens. Identifying where mold is growing can help narrow down its type.
Smell: A musty odor is a tell-tale sign of mold presence. If you notice this smell, it’s time to investigate further.
Recognizing the specific type of mold in your home is crucial. It informs you about potential health hazards, particularly with toxic mold types, and guides your remediation strategy.
Contain the Area
To effectively contain hazardous areas in your home, start by identifying zones that are most affected.
Use barriers like plastic sheeting to isolate these spaces and minimize the spread of contaminants.
Don’t forget to secure valuable items nearby to protect them from potential damage during your cleanup efforts.
Identify Hazardous Zones
When you’re dealing with hazardous zones in your home, pinpointing the affected areas is crucial for effective containment. Start by conducting thorough environmental assessments to identify where hazardous materials are located. This helps you understand the scope of the problem and strategize your next steps.
Here are some key points to consider while identifying these zones:
Inspect all rooms: Check for signs of water damage, mold growth, or any unusual odors that may indicate hazardous substances.
Focus on basements and attics: These areas can often harbor hidden dangers like asbestos or lead paint, especially in older homes.
Evaluate outdoor spaces: Look for improperly stored chemicals, decaying materials, or contaminated soil that could pose health risks.
Document findings: Keep a detailed record of hazardous zones, including photographs and notes, to share with professionals if further action is needed.
Use Barriers Effectively
Using barriers effectively is essential for containing hazardous areas in your home and preventing further exposure or contamination.
Start by identifying the types of barriers you can use, such as plastic sheeting, plywood, or specialized safety barriers. Each type serves a unique purpose, so choose wisely based on the hazard at hand.
Next, focus on barrier placement. Seal off rooms or areas where the hazard exists, ensuring there are no gaps where contaminants can escape.
Use tape to secure edges of plastic sheeting, or place plywood against doorways and windows. If possible, create a clear, well-marked path for entry and exit, keeping it away from hazardous zones.
Secure Valuable Items
Securing your valuable items is a crucial step in managing a crisis at home. During stressful times, the last thing you want is to worry about losing your cherished belongings. Implementing safe storage solutions protects your items and brings peace of mind.
Start by identifying what you value most—both emotionally and financially.
Consider the following strategies for valuable preservation:
Use Fireproof Safes: Invest in safes that can withstand fire and water damage. Keep important documents and irreplaceable items inside.
Create a Digital Inventory: Take photographs and document the details of your valuables. This helps in recovery and insurance claims.
Store Off-Site: If possible, consider renting a safety deposit box or a storage unit for high-value items that you don’t need immediate access to.
Disguise Valuables: Keep valuables in unexpected places or containers, making it harder for thieves to find them.
Use Protective Gear
Equipping yourself with the right protective gear is essential when tackling home repairs or renovations, especially during a crisis. You want to ensure your safety first and foremost, so don’t skip this crucial step.
Start by investing in high-quality protective clothing, such as gloves, goggles, and durable work boots. These items shield you from potential hazards like sharp objects, debris, and harmful substances that could be present during repairs.
When selecting safety equipment, make sure it’s appropriate for the task at hand. For instance, if you’re working with chemicals or mold, a respirator mask is a must. This gear protects your lungs and helps you breathe easier in potentially hazardous environments.
It’s also wise to wear long sleeves and pants to minimize skin exposure, so choose clothing made from thick, breathable materials that can withstand wear and tear.
Don’t forget about your hands—strong, well-fitting gloves can prevent injuries and provide a better grip on tools. If you’re working in areas with poor visibility, consider a hard hat or a helmet to protect against falling debris.
Finally, don’t overlook the importance of having a first aid kit nearby. Accidents can happen, and being prepared with the right safety equipment can make a significant difference.
Remove Affected Materials
Start by identifying the areas that have been damaged, as this will guide your removal process.
Use the proper tools, like a pry bar or utility knife, to carefully remove affected materials without causing further damage.
Always follow safety protocols, ensuring you wear gloves and a mask to protect yourself from dust and debris.
Identify Damaged Areas
After assessing your home for damage, the next crucial step is to identify the specific areas that need attention.
Start with thorough visual inspections, searching for damage indicators like discoloration, warping, or mold growth. These signs can help you pinpoint affected materials that need removal.
When inspecting, focus on these areas:
Walls and ceilings: Look for water stains or cracks that may indicate underlying issues.
Floors: Check for buckling or soft spots, which can suggest water damage or structural problems.
Basements and crawl spaces: Inspect for dampness, which can lead to mold and other hazards.
Roof and gutters: Look for missing shingles or debris that can cause leaks and further damage.
Once you identify the damaged areas, you’ll be better equipped to address the problems effectively.
Remember, it’s vital to act quickly and remove affected materials to prevent further deterioration.
Use Proper Tools
Having the right tools on hand is essential when it comes to removing affected materials from your home. Before diving into the work, make sure you’ve carefully chosen the right tools for the job. A sturdy pry bar, utility knife, and a reliable hammer are just a few essentials you’ll need.
Your tool selection should match the materials you’re dealing with, whether it’s drywall, flooring, or insulation.
Once you’ve gathered your tools, don’t forget about tool maintenance. Ensure that your tools are in good condition and functioning properly; this can make a huge difference in efficiency and safety. Dull blades or rusted edges can cause unnecessary strain and even accidents.
As you work, stay organized. Keep your tools within reach and clean up as you go to avoid tripping hazards. If you’re unsure about how to use a specific tool, look up tutorials or ask a knowledgeable friend.
Follow Safety Protocols
Gathering the right tools is just the beginning; following safety protocols, while removing affected materials is equally important. You must prioritize your safety and that of your loved ones.
Start by conducting safety drills with your family. Knowing how to react can make a significant difference during a crisis. Familiarize yourself with emergency protocols relevant to your situation, whether it’s water damage, fire, or mold.
Before you begin the removal process, consider these essential safety steps:
- Wear appropriate personal protective equipment (PPE): Gloves, masks, and goggles can shield you from harmful substances.
- Ensure proper ventilation: Open windows and doors to circulate fresh air, especially when dealing with hazardous materials.
- Disconnect utilities if necessary: Turning off electricity and water can prevent accidents and further damage.
- Dispose of materials safely: Follow local regulations for disposing of potentially hazardous waste.
Dry the Space Thoroughly
While it may seem daunting, drying the space thoroughly is crucial to prevent further damage and mold growth after a water-related incident. Start by removing any standing water using a wet/dry vacuum or mops. If you have carpets, take them out to dry separately.
Next, open windows and doors to increase airflow, which will help speed up the drying process. Consider your dehumidifier options. A portable dehumidifier can effectively reduce humidity in the air, making it easier for the space to dry. Set it to a lower humidity level, ideally around 30-60%, and keep it running until the area is completely dry. Remember to empty the water tank regularly.
In addition to using a dehumidifier, employ various drying techniques. Use fans to circulate air, directing them toward damp areas to enhance evaporation. If it’s safe, you can even use a heater to increase the temperature, which aids in drying.
Make sure to check for hidden moisture in walls and ceilings; you may need to remove baseboards or drill small holes to allow air circulation. Monitor the progress daily. Look for signs of mold or lingering dampness; if you notice any, it’s essential to act quickly.
Thorough drying protects your home and ensures your family’s health. By taking these steps, you’re not just restoring your space; you’re safeguarding your home and creating a safe haven for those you love.
Employ Professional Help
When facing significant water damage, seeking professional help can be a game-changer in the recovery process. You might feel overwhelmed, but professionals have the expertise and tools to address the situation effectively.
It’s crucial to act quickly, as delays can lead to further complications, including mold growth and structural damage.
When you’re considering contractor selection, keep these key points in mind:
Verify Credentials: Ensure the contractors are licensed, insured, and have good standing in your community. This protects you from liability and ensures quality work.
Check Reviews: Look for reviews and testimonials. Feedback from previous clients can provide valuable insights into their reliability and work ethic.
Request Estimates: Get multiple quotes to compare services and pricing. This helps you make an informed decision and find a contractor who fits your budget.
Inquire About Emergency Services: Many contractors offer emergency services. Confirm availability, as you may need immediate assistance, especially during a crisis.
Professional help expedites the recovery process and gives you peace of mind.
Prevent Future Growth
After addressing immediate water damage with professional help, it’s time to focus on preventing the future growth of mold and other issues. Taking proactive steps now can save you headaches down the road and create a healthier home environment for you and your family.
First, ensure your home has proper ventilation. Use exhaust fans in bathrooms and kitchens to reduce moisture levels. Open windows when possible to allow fresh air to circulate. Additionally, check your attic and crawl spaces for adequate airflow, as stagnant air can lead to mold growth.
Next, invest in preventive measures such as dehumidifiers, especially in basements or other humid areas. These devices can keep humidity levels below 60%, significantly reducing the risk of mold. Regularly inspect your roof and plumbing systems for leaks, as even small drips can create serious issues over time.
You should also consider future planning by using mold-resistant materials when making repairs or renovations. For instance, opt for mold-resistant drywall and paints, which are designed to resist moisture and inhibit mold growth.
Lastly, keep an eye on your indoor plants; overwatering can create damp conditions that are ideal for mold. Regularly check for signs of water damage, and address any issues immediately.
Document Everything
Documenting everything related to water damage is crucial for your recovery process and potential insurance claims. When disaster strikes, you may feel overwhelmed, but taking the time to document processes will help you stay organized and strengthen your case when dealing with insurance companies.
Here are some essential steps to consider:
Take Photos and Videos: Capture detailed visual evidence of the damage. Ensure you document the extent of the water intrusion, affected areas, and any personal belongings that may be damaged.
Keep a Record of Repairs: Document every repair process, including dates, costs, and service provider details. This helps establish a timeline and shows the effort put into mitigating further damage.
Maintain Communication Logs: Keep a detailed log of all conversations with insurance adjusters, contractors, and other relevant parties. Note dates, times, and what was discussed, as this can provide clarity later on.
Save All Documentation: Store receipts, invoices, estimates, and correspondence related to the damage and repairs. This collection will be invaluable when submitting claims.
Final Thoughts
As you stand amidst the chaos, remember that each moment counts. The water’s relentless encroachment threatens your home and peace of mind. By swiftly assessing damage, ensuring safety, and documenting everything, you can regain control. Don’t let mold’s sneaky advance catch you off guard. With protective gear and a plan, you can dry out your space and halt future threats. Reach out for professional help if needed. Your home’s recovery hinges on your decisive action now.