If you’ve experienced a water-related disaster in your home, the importance of restoring it quickly can’t be emphasized enough. From evaluating the extent of the damage to effectively drying out the affected areas, every step plays a vital role in the restoration process. But what if there was a way to expedite this process while ensuring thoroughness and efficiency? By implementing strategic methods and tools, you can greatly reduce the time and effort required to return your home to its pre-damaged state.
Key Takeaways
- Promptly extract water using towels, mops, or sump pump rentals.
- Strategically position drying equipment for efficient airflow.
- Monitor moisture levels with meters and ensure proper ventilation.
- Thoroughly inspect for damage, prioritize safety, and develop a restoration plan.
- Dispose of debris responsibly, clean and disinfect all surfaces to eliminate mold and odors.
Assessing the Water Damage
To accurately assess the extent of water damage in your home, thoroughly inspect all affected areas. A prompt moisture assessment is essential to understand the full scope of the damage. Take note of any dampness, discoloration, or unusual odors indicating water presence in hidden spaces. By conducting a detailed damage evaluation, you can identify the areas needing immediate attention.
In times like these, a quick response is key. Initiating an emergency response plan can help prevent further damage and mold growth. Contacting professionals to assist with the restoration timeline is crucial for a swift recovery. They can provide expert guidance on the best course of action to efficiently restore your home to its pre-damage condition.
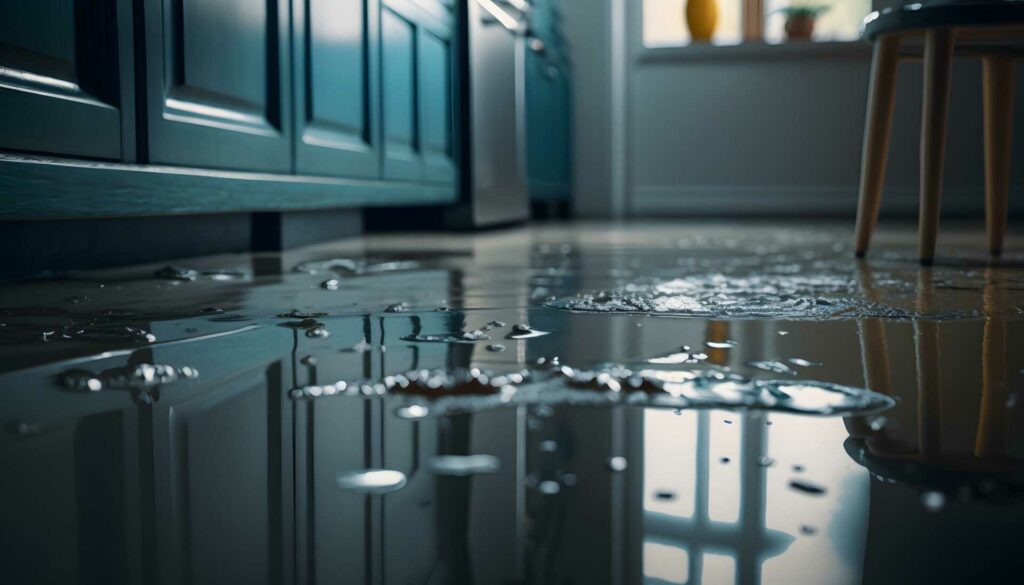
Extracting Water From the Property
Inspect all impacted areas thoroughly to locate and promptly extract water from your property. Time is crucial when it comes to water extraction to enhance drying efficiency and prevent further damage.
Start by using towels, mops, or a wet vacuum to remove as much water as possible from the floors and surfaces. Remember, the sooner you act, the better the outcome for your home’s restoration timeline.
When extracting water, prioritize safety. Confirm the electricity is turned off in all affected areas to avoid any electrical hazards. Wear protective gear such as gloves and boots to minimize health risks if the water is contaminated. Additionally, be cautious of slippery surfaces to prevent accidents during the extraction process.
To improve water extraction, consider renting or purchasing a portable sump pump or hiring a professional water restoration service. These tools can greatly accelerate the process and enhance drying efficiency.
Make sure to extract water from hidden or hard-to-reach areas such as under cabinets or inside walls to prevent mold growth and structural damage.
Setting Up Drying Equipment
Now, let’s focus on setting up your drying equipment efficiently.
Proper equipment placement and optimizing airflow are key factors in ensuring a swift and effective drying process.
Equipment Placement
Position the drying equipment strategically in areas with the most moisture for optimal results. When implementing drying strategies, focusing on equipment placement is vital to maximize efficiency. Maintain proper equipment to guarantee peak performance during the restoration process.
To effectively dry your home, position dehumidifiers near sources of moisture like water-damaged walls or floors. By concentrating the equipment in these critical areas, you accelerate the drying process and prevent further damage.
Additionally, air movers should be strategically placed to create airflow patterns that enhance evaporation and moisture removal.
Regular equipment maintenance is essential to ensure the devices operate at their best. Clean filters and coils as recommended by the manufacturer to prevent malfunctions and maintain efficiency. By taking care of your drying equipment, you prolong their lifespan and enhance their effectiveness in restoring your home.
Airflow Optimization
To enhance airflow for efficient drying, strategically position your drying equipment to create effective evaporation patterns. Proper airflow is essential for reducing humidity levels and accelerating the drying time of your home.
By setting up fans and dehumidifiers in strategic locations, you can promote ideal airflow patterns that enhance moisture evaporation.
Guarantee that your drying equipment is placed in a way that encourages air circulation throughout the affected areas. Point fans towards wet surfaces and guarantee that dehumidifiers are placed in central locations to maximize their reach.
This strategic setup will help maintain consistent airflow and humidity control, ultimately speeding up the drying process.
Monitoring the Drying Process
Monitor the drying process’s progress and moisture levels closely to ensure effective restoration of your home.
Here are some essential tips to help you monitor the drying process effectively:
- Utilize Moisture Meters: Invest in a quality moisture meter to regularly check moisture levels in different areas of your home.
- Track Changes: Keep a log or record of moisture readings over time to monitor the drying progress accurately.
- Inspect Regularly: Check for any signs of lingering moisture or dampness in walls, floors, and ceilings.
- Ventilation Check: Confirm proper airflow and ventilation to aid in the drying process and prevent mold growth.
- Consult Professionals: If in doubt or if moisture levels remain high, seek assistance from restoration professionals for a thorough assessment.
Structural Drying Techniques
When drying your home’s structure, focus on efficient moisture removal and implementing proper ventilation methods. These techniques are essential in ensuring that your home dries quickly and thoroughly.
Efficient Moisture Removal
For best results, consistently monitor and adjust the structural drying techniques employed in your home. Implementing the right strategies is key to restoring your home quickly when it comes to efficient moisture removal.
Here are some tips to help you effectively remove moisture from your living space:
- Strategic Dehumidifier Placement: To aid in moisture control, position dehumidifiers in areas prone to high moisture levels, such as basements or bathrooms.
- Regularly Check Humidity Levels: Use a hygrometer to monitor humidity levels and adjust drying techniques accordingly.
- Utilize Rapid Drying Strategies: Employ techniques like using fans, opening windows, and running air conditioning to speed up the drying process.
- Inspect and Address Leaks: Regularly check for leaks in pipes, roofs, or windows, and promptly fix any issues to prevent further moisture buildup.
- Remove Wet Materials: Discard or dry out wet carpets, furniture, and other materials to prevent mold growth and further water damage.
Proper Ventilation Methods
Strategically placing fans throughout your home can enhance structural drying by promoting proper ventilation and air circulation. When dealing with water damage, implementing effective ventilation strategies is important for humidity control and preventing mold growth.
By increasing air circulation, you can expedite moisture management and restore your home to its pre-damaged state more efficiently.
To improve ventilation, open windows, and doors to allow fresh air to flow through the affected areas. Position fans in key locations to ensure proper airflow and circulation.
Additionally, using dehumidifiers can help reduce excess moisture in the air, further assisting in the drying process.
Restoring Damaged Areas
Begin by assessing the extent of the damage in each area before proceeding with restoration efforts. Look closely at each affected space to determine the best course of action for bringing your home back to its former state.
Consider the following steps to efficiently restore damaged areas:
- Inspect Thoroughly: Check for water damage, mold growth, and structural issues to understand the full scope of the damage.
- Prioritize Safety: Ensure the area is secure to work in before beginning any restoration activities to prevent accidents or injuries.
- Implement Quick Fixes: Address immediate concerns like water extraction, drying, and mold removal to prevent further damage.
- Develop a Restoration Plan: Create a detailed plan outlining the steps needed for both quick fixes and long-term solutions.
- Seek Professional Help: Consider contacting restoration experts for complex issues or extensive damage that may require specialized knowledge or equipment.
Final Inspections and Cleanup
Conduct a comprehensive final inspection and start the cleanup process to make certain all restoration efforts have been completed effectively. Begin by referring to a post-inspection cleaning checklist to confirm no detail is overlooked. Start by checking the structural integrity of the restored areas. Look for any signs of moisture, mold, or odors indicating incomplete drying. Verify that all damaged materials have been properly replaced or repaired.
Once the inspection is complete, prioritize safety precautions before beginning the cleanup. Wear appropriate personal protective equipment such as gloves, goggles, and masks, especially if dealing with mold or hazardous materials. Implement proper ventilation to prevent the accumulation of harmful fumes during the cleanup process.
Next, focus on debris removal. Dispose of any damaged materials, debris, or contaminated items responsibly. Separate items that can be salvaged from those that are beyond repair. Remember to follow local regulations for waste disposal to avoid any environmental hazards.
After removing debris, thoroughly clean and disinfect all surfaces in the restored areas. Use suitable cleaning agents to eliminate any remaining mold spores, bacteria, or odors. Pay special attention to hidden or hard-to-reach areas that may have been missed during the initial restoration process.
Recap
Now that you have followed these steps to dry and restore your home quickly after water damage, you can rest assured that your property is safe and clean. By taking proactive measures and utilizing efficient techniques, you have successfully addressed the water damage and restored your home to its pre-damaged condition.
Remember to regularly inspect and maintain your property to prevent future issues and guarantee a safe living environment.