When initiating a detailed mold assessment, you may wonder about the intricacies involved in identifying and addressing mold growth effectively. From the initial consultation to the meticulous documentation of findings, each step in the assessment process plays an essential role in ensuring a thorough understanding of the situation. As you navigate through the various stages of assessment, you will uncover the vital components that contribute to a successful mold evaluation. So, what exactly does this in-depth assessment entail, and how does each step contribute to the overall process of mold remediation and verification?
Key Takeaways
- Visual Inspection: Identify mold growth and water damage.
- Moisture Detection: Find sources, monitor humidity levels.
- Sampling and Evaluation: Test surfaces and air quality.
- HVAC System Evaluation: Check for mold-contributing issues.
- Documentation: Detailed report with remediation recommendations.
Pre-Assessment Consultation
During the pre-assessment consultation, you’ll discuss the scope of the mold assessment with the client to ensure a thorough understanding of the situation. This initial step is vital in setting the foundation for the assessment process. You’ll need to provide the client with a clear cost estimation for the assessment, ensuring transparency and trust in the services you offer. Additionally, discussing scheduling availability during this consultation is important to accommodate the client’s needs and set a suitable timeline for the assessment.
Engaging in detailed conversations with the client during the pre-assessment consultation allows you to gather pertinent information about the property and any specific concerns the client may have. This information will aid in tailoring the assessment to address the client’s unique situation effectively. By offering a detailed cost estimation, you demonstrate professionalism and reliability, instilling confidence in the client regarding the services you provide.
Furthermore, discussing scheduling availability at this stage enables you to plan the assessment efficiently, minimizing interruptions to the client’s routine. Clear communication regarding the timeline for the assessment ensures that both parties are aligned on expectations, fostering a positive working relationship. Ultimately, the pre-assessment consultation serves as a critical starting point in the mold assessment process, laying the groundwork for a successful and thorough evaluation.
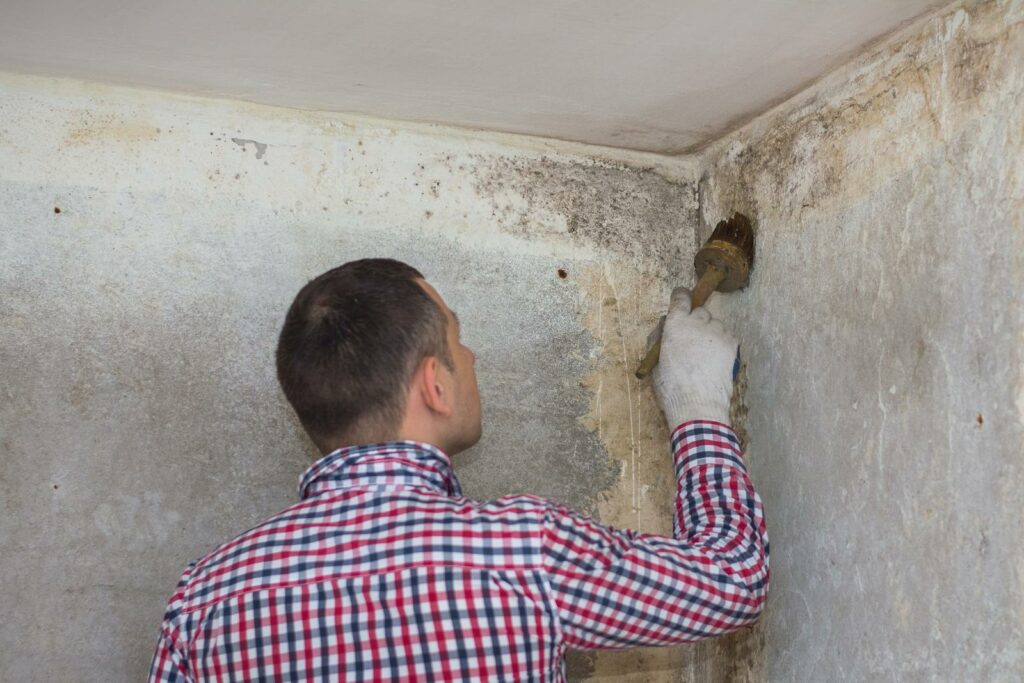
Visual Inspection
As you begin the visual inspection process,
you’ll conduct a thorough assessment of the property to identify any potential areas of mold growth or water damage.
You’ll carefully document key findings such as visible mold growth, water stains, musty odors, and signs of moisture intrusion.
This detailed documentation will serve as an essential reference point for developing an effective mold remediation plan.
Inspection Process Overview
Engage in a systematic visual inspection of the area to identify any visible signs of mold growth or water damage. This initial step is vital in determining the extent of the mold issue and the underlying causes.
Look for discoloration on walls, ceilings, or floors, as well as any musty odors that could indicate mold presence. Check for any past or current water leaks, condensation, or high humidity levels that might’ve facilitated mold growth.
During the inspection, pay close attention to areas prone to moisture accumulation, such as bathrooms, kitchens, basements, and around windows. Inspect hidden spaces like behind drywall, under carpets, and in crawl spaces thoroughly.
Note any areas that show signs of mold testing or remediation or require mold prevention and maintenance measures.
A detailed visual inspection sets the foundation for further mold assessment procedures, guiding the next steps in the process accurately and effectively.
Key Findings Documentation
Conduct a thorough examination of the visual cues identified during the initial inspection to document key findings related to mold growth and water damage. Utilize this visual data to inform your mold spore analysis and develop a detailed remediation plan.
Start by detailing the location and extent of mold growth, noting any discoloration, musty odors, or water stains. Document moisture sources that could be contributing to mold proliferation, such as leaks or areas of high humidity. Take precise measurements of affected surfaces and areas, including building materials and contents.
Capture photographs or videos to provide visual evidence of the observed mold growth and water damage. Note any visible mold spores or signs of water intrusion that could indicate potential mold hazards. Compile all findings into a thorough report that outlines the severity of the situation and recommends specific actions for remediation.
This documentation will serve as an essential reference point for developing an effective mold remediation plan tailored to address the identified issues comprehensively.
Moisture Detection
You must identify the source of moisture in the environment to prevent mold growth effectively.
Monitoring humidity levels is vital in evaluating the risk of condensation and potential mold development.
Conducting a thorough moisture detection process is essential for a thorough mold evaluation.
Moisture Source Identification
Identify the source of moisture through thorough inspection and precise detection methods to accurately assess potential mold growth risks. Leak detection is a critical aspect of moisture source identification. It involves examining areas prone to leaks, such as roofs, plumbing fixtures, and windows, to detect any potential water intrusion points.
Implementing prevention strategies, like regular maintenance of plumbing systems and roof inspections, can help in mitigating the risks associated with leaks.
To prevent mold growth, it’s essential to address the root cause by identifying and eliminating moisture sources. Mold growth prevention methods include fixing any leaks promptly, ensuring proper ventilation in damp areas like bathrooms and kitchens, and using dehumidifiers to maintain ideal humidity levels.
By proactively identifying and resolving moisture sources, you can greatly reduce the likelihood of mold proliferation in your indoor environment.
Thoroughly investigating potential moisture sources and taking proactive measures to address them is key to preventing mold growth and maintaining a healthy indoor environment.
Humidity Level Monitoring
Monitoring humidity levels is crucial in detecting potential moisture issues that can lead to mold growth. By regularly monitoring and controlling humidity levels in your indoor spaces, you can effectively prevent mold from flourishing.
Humidity control is an essential aspect of mold prevention because mold thrives in damp environments with high moisture levels. To maintain ideal humidity levels, it’s recommended to keep indoor humidity below 60%. Investing in a hygrometer can help you accurately measure the humidity in your home or office.
Additionally, ensuring proper ventilation in areas prone to moisture build-up, such as bathrooms and kitchens, can aid in controlling humidity levels. If you notice consistently high humidity readings, it’s essential to address any underlying issues promptly to prevent mold growth.
Condensation Risk Assessment
Evaluating the risk of condensation is vital in detecting potential moisture issues that could contribute to mold growth. Conducting a thorough risk analysis involves examining the environmental conditions within a building that may lead to condensation formation. Factors such as temperature differentials, humidity levels, and building materials play essential roles in determining condensation risks.
To mitigate these risks, implementing effective prevention strategies is necessary. This may include improving ventilation systems to reduce excess moisture in the air, utilizing dehumidifiers in areas prone to condensation, and ensuring proper insulation to minimize temperature differentials.
Regularly monitoring indoor humidity levels and promptly addressing any condensation issues can help prevent moisture buildup and subsequent mold growth.
Air Quality Sampling
To evaluate the air quality in a space for potential mold contamination, sampling methods can be utilized. Understanding the presence of indoor pollutants and their health effects is vital for maintaining a healthy environment.
Here are three key points to keep in mind when conducting air quality sampling:
Sampling Techniques: When evaluating air quality for mold contamination, various sampling techniques can be employed. Methods such as air sampling using spore traps or bioaerosol samplers can help capture mold spores present in the air. Surface sampling techniques, like tape lifts or swabbing, can also be used to collect mold from visible surfaces. These samples are then analyzed in a laboratory to identify the types and concentrations of mold present.
Data Analysis: After collecting air samples, the data obtained needs to be thoroughly examined to interpret the results accurately. This analysis involves identifying the types of mold spores present, their concentrations, and comparing these findings to established guidelines for indoor air quality. Understanding the data is essential for determining the level of mold contamination and the potential health risks associated with it.
Health Effects: Mold exposure can lead to various health consequences, ranging from mild allergic reactions to severe respiratory issues. By conducting air quality sampling, you can evaluate the level of mold contamination in a space and take necessary measures to mitigate any health risks posed by mold exposure. Maintaining good indoor air quality is essential for promoting overall well-being and reducing the risk of mold-related health problems.
Surface Sampling
Surface sampling involves collecting samples from visible materials within a space to assess the presence of mold contamination. Various sampling methods can be employed, such as tape lift sampling, swab sampling, and bulk sampling.
Tape lift sampling entails using clear tape to collect mold from surfaces. Swab sampling involves rubbing a swab over a specific area to gather mold particles. Bulk sampling, on the other hand, includes taking physical pieces of material suspected of mold contamination for analysis.
Once the samples are collected, they’re sent to a laboratory for analysis. Laboratory analysis is essential in determining the type and concentration of mold present on the surfaces. This analysis helps identify the extent of mold contamination and its potential health risks. Additionally, laboratory results provide valuable information for devising an effective remediation plan to address the mold issue.
It is important to note that surface sampling is just one part of a thorough mold assessment. When combined with other assessment techniques like air quality sampling and visual inspections, surface sampling can provide a detailed understanding of the mold situation in a particular space. This inclusive approach ensures a more accurate assessment and enables the implementation of targeted solutions to mitigate mold growth and safeguard indoor air quality.
HVAC System Evaluation
A thorough evaluation of the HVAC system is vital in determining its potential role in mold growth within a space. When conducting a detailed mold assessment, evaluating the HVAC system is essential for identifying any issues that may contribute to mold proliferation.
Here are three key aspects to contemplate during the HVAC system evaluation:
Regular HVAC Maintenance: Scheduled maintenance of your HVAC system is essential in preventing mold growth. Make sure filters are changed regularly, ducts are clean, and there are no leaks in the system that could lead to moisture buildup, creating a favorable environment for mold to thrive.
System Upgrades: Upgrading your HVAC system can significantly reduce the risk of mold growth. Newer systems often come with features like humidity control, which can help maintain ideal moisture levels, inhibiting mold development. Consider investing in system upgrades to improve air quality and reduce the likelihood of mold issues.
Professional Inspection: Engage a qualified HVAC technician to conduct a thorough inspection of your system. They can identify any existing problems, recommend necessary maintenance or upgrades, and provide expert advice on how to enhance your HVAC system to prevent mold growth effectively.
Documentation and Reporting
Accurate documentation and thorough reporting are essential elements of a detailed mold assessment process. During a mold assessment, meticulous data analysis is conducted to compile all pertinent information related to the presence of mold in a given environment. This data includes findings from visual inspections, air and surface sampling results, moisture levels, temperature readings, and any relevant background information.
Once the data analysis phase is complete, the next important step is to organize this information into a detailed report. The reporting format must be structured in a clear and systematic manner to guarantee that all findings are presented logically and cohesively. This report typically includes a thorough description of the assessment process, a summary of the findings, including types and quantities of mold present, moisture sources, affected areas, and any potential health risks identified.
Furthermore, the report should outline any recommendations for remediation based on the assessment results. These recommendations will be discussed in detail in the next subtopic.
The documentation and reporting phase serves as a vital tool for stakeholders involved in the mold assessment process, providing them with a clear understanding of the extent of the mold issue and the necessary steps to address it effectively.
Remediation Recommendations
To effectively address the mold issues identified during the assessment, thorough recommendations for remediation must be carefully outlined. Mold remediation recommendations are vital in ensuring a safe and healthy environment within your space.
Here are three key aspects to ponder:
- Prevention Strategies: Implementing prevention strategies is essential to avoid future mold problems. This involves identifying and addressing the root cause of moisture that initially led to mold growth. Make sure proper ventilation is maintained, leaks are addressed promptly, and indoor humidity levels are below 60% to prevent mold from thriving.
Mold Testing: Before initiating the remediation process, conducting mold testing is imperative. This step helps determine the type and extent of mold present, guiding the remediation specialists in formulating an effective plan customized to your specific situation.
Remediation Techniques: Once the assessment and testing are completed, the removal process can begin. Remediation techniques may involve isolating the affected area, using HEPA vacuums, removing and replacing contaminated materials, and applying antimicrobial solutions to prevent regrowth.
Post-Remediation Verification
Verification of the effectiveness of the mold remediation process is essential to confirm that the space is now free from mold contamination. Post-remediation testing, also known as clearance testing, is conducted to assess whether the remediation efforts have been successful in removing the mold and restoring indoor air quality to acceptable levels. This final step involves thorough mold spore analysis and a detailed final inspection of the treated area.
During post-remediation testing, air and surface samples are collected from the remediated space to check for the presence of any remaining mold spores. These samples are then analyzed in a laboratory to determine if the mold levels are within acceptable limits. Additionally, visual inspections are carried out to make sure that all affected materials have been properly cleaned or removed.
Clearance testing provides peace of mind that the mold remediation process has been effective and that the space is now safe for occupancy. If the results meet the required standards, a clearance certificate may be issued, indicating that the remediation was successful. However, if elevated mold levels are detected during post-remediation testing, further remediation efforts may be necessary to address any remaining issues.
Wrap-Up
A thorough mold assessment involves a detailed process that includes:
- Pre-assessment consultation
- Visual inspection
- Moisture detection
- Air quality sampling
- Surface sampling
- HVAC system evaluation
- Documentation
- Reporting
Remember, ‘an ounce of prevention is worth a pound of cure’ when it comes to mold issues in your home or building. Following these steps and recommendations can ensure a successful mold assessment and remediation process.