Imagine walking into a home where the air feels thick and damp, much like stepping into a forgotten cave. Mold isn’t just unsightly; it’s a serious health concern that demands a strategic approach. You might wonder how professionals tackle such a pervasive issue effectively. From thorough assessments to advanced removal techniques, each step is crucial in ensuring a safe environment. But what exactly are the best practices that can turn a mold-infested space into a clean, healthy haven? Let’s explore the top seven techniques that make a significant difference.
Key Takeaways
- Conduct thorough mold assessment and identification to determine the type and extent of the growth before cleanup begins.
- Utilize proper containment measures, such as sealing affected areas and establishing negative air pressure, to prevent spore spread during remediation.
- Equip workers with appropriate personal protective equipment (PPE), including respirators, gloves, and goggles, to ensure safety during the cleanup process.
- Implement effective mold removal techniques, such as scrubbing hard surfaces with detergent or using bleach for disinfection on non-porous materials.
- Perform post-cleanup evaluations, including air quality testing and moisture inspections, to ensure the effectiveness of remediation efforts and prevent future mold growth.
Assessing Mold Contamination
Before tackling mold cleanup, it’s crucial to assess the extent of mold contamination in your space. Start by identifying visible mold growth, which can appear in various colors, indicating different mold types. Common types include Aspergillus, Cladosporium, and Stachybotrys, each with unique characteristics and potential health effects.
It’s essential to understand that not all molds are toxic, but many can still trigger allergies or respiratory issues.
Next, evaluate the moisture levels in your environment. Mold thrives in damp conditions, so check areas prone to humidity, like basements, bathrooms, and kitchens. Use a moisture meter to measure levels in materials such as drywall or wood. If the readings are elevated, mold growth is likely present.
Don’t forget to inspect hidden areas, like behind wallpaper or beneath carpets. You might need to lift these items to check for concealed mold growth. Additionally, consider utilizing air sampling tests, which can help identify airborne mold spores. These tests can reveal if the mold types present pose a risk to your health.
While assessing, pay attention to any health effects experienced by occupants. Symptoms like coughing, sneezing, or skin irritation may indicate mold exposure.
Document your findings thoroughly, as this information will guide your cleanup strategy. By understanding the extent of contamination and potential health risks, you’ll be better equipped to tackle mold cleanup effectively and ensure a safer, healthier living environment for everyone.
Containment Strategies
To effectively manage mold cleanup, you’ll need to implement containment strategies that prevent further contamination.
Start by sealing off affected areas to isolate the mold and then establish negative air pressure to control air movement.
Additionally, using barrier materials can help maintain a safe environment during the remediation process.
Seal Off Affected Areas
Sealing off affected areas is a crucial step in mold cleanup, as it helps prevent spores from spreading to uncontaminated spaces. To effectively contain the mold, start by using plastic sheeting to cover doorways, vents, and any openings leading to unaffected rooms. This barrier restricts airflow and minimizes cross-contamination during the cleanup process.
Before you begin, employ mold identification techniques to determine the extent of the infestation. This will guide your containment efforts and ensure you’re addressing the most affected areas first. Additionally, performing an air quality assessment can provide insight into the levels of mold spores present, allowing you to tailor your cleanup strategy accordingly.
While sealing off spaces, ensure you’re also wearing appropriate personal protective equipment (PPE) to safeguard yourself from exposure.
Remember, a thorough evaluation of the entire environment is essential, as mold can hide in less visible areas. By securing the affected zones effectively, you create a safer workspace, making your mold remediation process more efficient and successful.
Following these steps fosters a sense of community responsibility toward maintaining a healthy environment for everyone.
Negative Air Pressure
Negative air pressure is an essential containment strategy during mold cleanup, as it effectively prevents the spread of spores to clean areas. By creating a lower-pressure environment within the affected space, you can ensure that airborne particles are contained, minimizing cross-contamination.
This technique involves using air filtration units equipped with HEPA filters, which capture mold spores and other particulate matter.
To implement negative pressure, you’ll need to seal off the contaminated area properly. Once sealed, place a negative air machine in the room, ensuring it exhausts air outside. This setup generates negative pressure, allowing air to flow inward but not outward.
It’s crucial that you monitor the pressure regularly to maintain an effective containment level.
Additionally, you should always keep doorways and openings covered with plastic sheeting to enhance the effectiveness of the negative pressure system. This protects clean areas and helps in the efficiency of air filtration.
Use of Barrier Materials
Effective use of barrier materials is crucial for controlling mold contamination during cleanup operations. By setting up physical barriers, you can effectively isolate affected areas, preventing mold spores from spreading to clean spaces.
Start by choosing appropriate barrier materials, such as heavy-duty plastic sheeting or specialized containment curtains. These materials provide effective insulation, ensuring that airborne particles are contained within the work zone.
When installing barriers, make sure to seal all edges tightly with tape to eliminate any gaps. This step is vital, as even small openings can allow spores to escape. Use negative air machines in conjunction with your barriers to create a pressure differential, further minimizing contamination risk.
Additionally, you should consider the layout of your workspace. Designate a clean area for workers and equipment, ideally away from the contaminated zone. This helps maintain a clear separation, fostering a safer environment for everyone involved.
Personal Protective Equipment
When tackling mold cleanup, wearing appropriate personal protective equipment (PPE) is crucial to safeguard your health. Mold spores can lead to serious respiratory issues and skin irritations, so you need to ensure you’re fully equipped. Here’s a breakdown of essential PPE components that’ll help you stay protected during the cleanup process.
| PPE Component | Purpose |
|---|---|
| Respiratory Protection | Prevents inhalation of mold spores and harmful particles. |
| Protective Clothing | Shields your skin from mold exposure and allergens. |
| Gloves | Protects your hands from direct contact with contaminated materials. |
| Goggles | Shields your eyes from splashes and irritants. |
| Boot Covers | Prevents mold spores from adhering to your footwear. |
Respiratory protection is particularly important. Opt for an N95 respirator or a higher-rated mask to effectively filter out airborne particles. It’s also advisable to wear protective clothing, such as disposable coveralls, to minimize skin exposure. Gloves, preferably made of nitrile or rubber, will further protect your hands. Goggles will help keep your eyes safe from irritants, while boot covers will prevent tracking mold spores into other areas.
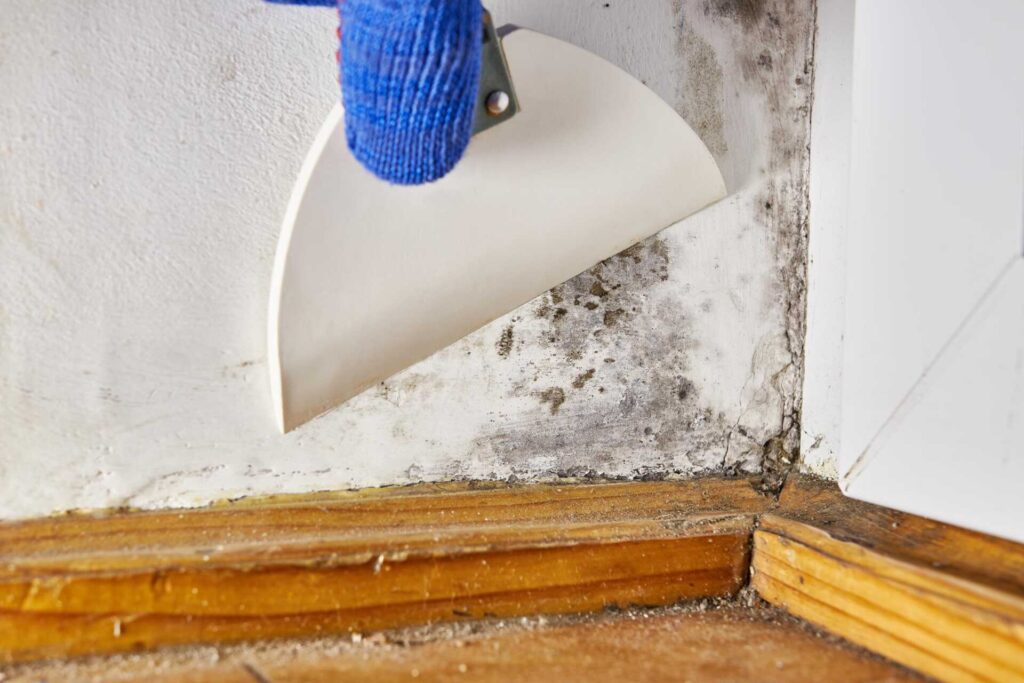
Mold Removal Techniques
After ensuring you’re equipped with the right personal protective equipment, you can focus on the actual mold removal process.
Start by identifying the extent of the mold growth. This helps you determine whether you can handle the situation yourself or if you need to call in professionals. For small areas, such as a few square feet, you can proceed with safe removal techniques.
Begin by isolating the affected area. Seal off doorways and vents with plastic sheeting to prevent spores from spreading.
Next, you’ll want to use a mixture of water and detergent to scrub the mold off hard surfaces. Make sure to use a stiff-bristle brush for thorough cleaning. For porous materials, like drywall or carpeting, you may need to remove and replace them entirely, as mold can penetrate deeply.
To enhance mold growth prevention, ensure that you dry any damp materials promptly. Use dehumidifiers in humid environments to maintain low moisture levels.
After cleaning, consider applying a mold-resistant sealant to surfaces that are prone to future infestations.
In cases where mold is extensive, you might want to rely on specialized products specifically designed for mold removal. These can provide more effective results when used according to the manufacturer’s instructions.
Remember, proper ventilation is key during this process to ensure that any airborne spores are minimized.
Following these steps aids in the safe removal and sets the stage for long-term mold growth prevention in your space.
Surface Disinfection Methods
To tackle mold contamination effectively, you should incorporate surface disinfection methods as part of your cleanup strategy. Proper surface preparation is crucial before applying any disinfection agents, as it ensures that the agents can penetrate and eliminate any remaining mold spores effectively. Begin by removing any loose debris or materials from the affected area.
Here’s a quick overview of common disinfection agents and their applications:
| Disinfection Agents | Applications |
|---|---|
| Bleach | Non-porous surfaces |
| Hydrogen Peroxide | Non-porous surfaces |
| Vinegar | Non-porous surfaces |
| Quaternary Ammonium | Soft surfaces |
| Isopropyl Alcohol | Non-porous surfaces |
Each disinfection agent has its unique characteristics. For instance, bleach is effective on non-porous surfaces but isn’t suited for porous materials. Hydrogen peroxide offers a less harsh alternative, effectively targeting mold on various surfaces. Vinegar is a natural option that can be useful for minor infestations but may lack potency against dense mold colonies. Quaternary ammonium compounds work well on soft surfaces, while isopropyl alcohol is excellent for quick disinfecting tasks.
After applying your chosen agent, allow sufficient contact time as specified by the manufacturer. This ensures maximum efficacy in eliminating mold spores. By following these surface disinfection methods, you can significantly enhance your mold cleanup efforts and create a healthier environment.
Drying and Dehumidification
Effective drying and dehumidification are critical steps in mold cleanup, as they help eliminate moisture that fuels mold growth. To ensure a successful process, you need to focus on air circulation and moisture control.
Start by assessing the affected area to determine the extent of moisture intrusion. Once you identify the problem, utilize high-capacity dehumidifiers to reduce humidity levels effectively. These devices work by drawing in moist air, removing the moisture, and releasing dry air back into the environment.
Simultaneously, enhance air circulation by using fans to promote airflow throughout the space. Positioning fans strategically can help direct airflow toward damp surfaces, which accelerates the drying process.
Ensure that windows and doors are open, if possible, to create cross-ventilation, facilitating even greater moisture control.
Monitor humidity levels with hygrometers to confirm you’ve achieved an ideal relative humidity of 30-60%. This is crucial; maintaining this range aids in drying and prevents mold from returning.
As drying progresses, keep an eye on materials like carpets, drywall, and wood, as they can retain moisture. If materials remain damp for too long, they may need to be discarded to prevent further mold growth.
Post-Cleanup Evaluation
Following the completion of mold cleanup, a thorough post-cleanup evaluation is essential to ensure that all mold has been effectively removed and that the environment is safe for reoccupation.
This evaluation validates the effectiveness of your cleanup efforts and addresses any lingering health concerns.
Here’s how you can systematically approach this critical step:
Conduct a Mold Spore Analysis: Utilize air sampling and surface testing to analyze mold spore levels in the environment. This will help you confirm that the air quality meets acceptable standards.
Perform a Health Impact Assessment: Evaluate any potential health effects on individuals who may have been exposed to mold. This assessment can include reviewing symptoms reported by residents and ensuring that there are no ongoing health hazards.
Inspect for Moisture Issues: Check for any signs of moisture that could foster future mold growth. Ensure that all previously affected areas are dry and that the dehumidification process has been successful.
Document Findings and Remediation Steps: Keep a detailed record of your evaluation, including test results and any follow-up actions. This documentation can be valuable for future reference and provides peace of mind to occupants.
Final Thoughts
Effective mold cleanup requires a systematic approach that encompasses assessment, containment, and removal techniques. By employing proper personal protective equipment and advanced disinfection methods, you can ensure a safer environment. Don’t forget the importance of drying and long-term prevention strategies to keep mold at bay. After all, wouldn’t you rather invest time in a thorough cleanup now than face the health risks and costs of mold later? Prioritize these techniques for a healthier space.